Board game spaces on paths in Adobe InDesign [Bargain Basement Bathysphere]


The Design Challenge
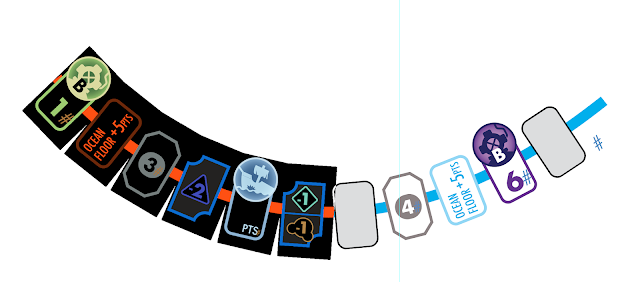
In the image above, you can see how a final map has a serpentine layout, filled with several types of spaces at irregular intervals. We needed a layout solution that would do the following:
- Allow us to adjust paths of an entire sequence of spaces without having to manually move and rotate every single object.
- Keep a literal line connecting the spaces to one another, but it must be in the background and ideally not require a lot of manual editing either, since there will be many paths.
- Use linked images for the spaces rather than making raw vector shapes. The spaces only came in a few different types, but would repeat many, many times.
Solution: Type on Path + Anchored Objects
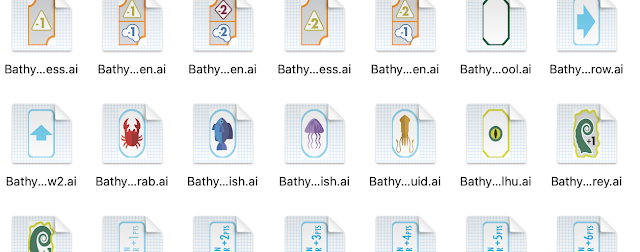
First, we used Adobe Illustrator to design a library of spaces. These are all designed to the same height and width, but with individual variation so they're easily distinguished at a glance. Different colors, icons, corners, border types, etc. Once this was all done, they were saved in the Links folder. Then we used the Place function to bring one of each type of space into the InDesign document, off to the side of the art board.
Next, we used the type-on-path feature in InDesign. This feature is normally used to add text to an arbitrary vector path as its baseline, often on circles or simple curves. Using the original prototype files as a loose guide, we used the Pen tool to draw the original vector paths. Then we used the type-on-path tool to make those paths a baseline for text. However, our plan wasn't to use text here at all. Instead, the "text" is actually anchored objects copy-pasted into the text path.
Further Refinements
The beauty of this solution is that we could style the vector path's color, width, and style however we liked, without affecting the spaces. We could also select all the contents of a path and adjust the spacing and baseline alignment as if it were text. Moreover, we could gently adjust the curves on the path and the spaces would simple follow along that path, because they were being treated as anchored objects in a text line.

Now this did result in some small adjustments in practice. When a curve would result in a space turning beyond 90deg, we'd flip that space so it would read right-side-up. Also some especially tight curves would cause spaces to overlap, and in those cases we did manually hit the spacebar a few times between the anchored objects.

We also used Object Styles to change the path's appearance and add effects to the paths and objects independently of each other. Namely, I wanted to add a drop shadow behind the path alone, not behind the objects as well.
Overall though, this allowed us to iterate all three maps very quickly. We could fix individual errors without affecting the rest of the map. We could create new maps without much fuss. Overall, it's a great method if you need to make a branching style map like this. I recommend it!
To see this in action, I recommend watching this demonstration video:


Comments
Post a Comment